Routing Out with Labels
Use a simple call center as an example. Here, we will have 3 types of calls entering
the system, which must then be routed to the appropriate operator based on the type of
call it is. 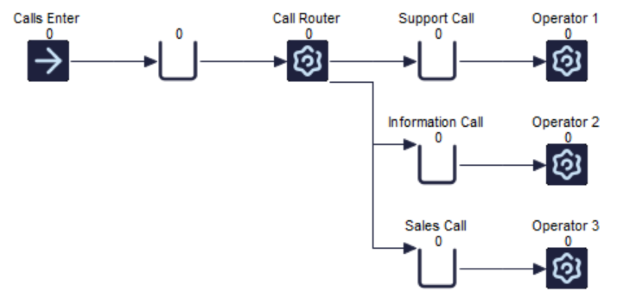
If we have a set-up like the above, we must first create a Label that will determine the
types of calls coming into the system. To do this, we select the Start Point, and then
on the Properties Tab of the ribbon, we select 'Actions'. In the Actions window, we can
create a new numerical Label by selecting 'Add a Label to Change'. Call this
lbl_CallType, and we will Set it to a value, having a Rounded Uniform Distribution
between 1 and 3. 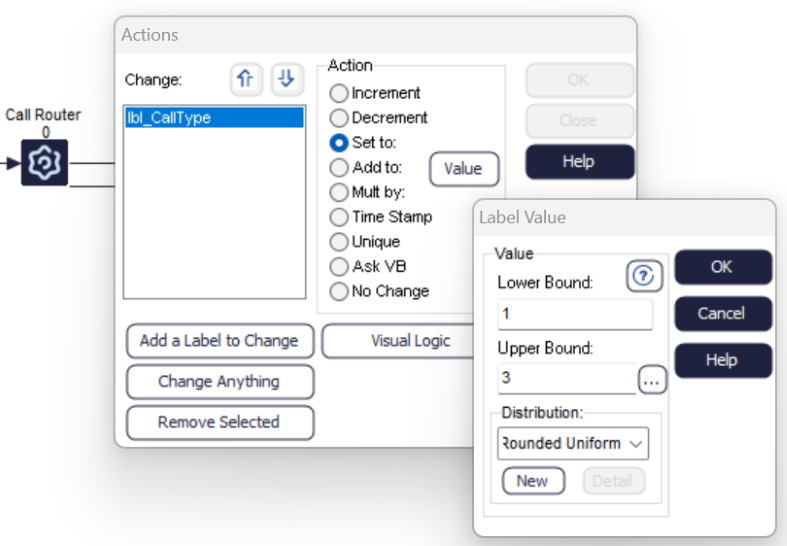
We now have an equal chance of all calls being either Support, Information, or Sales related
for the purpose of this example. Now that the Labels are set up, we must adjust the Call
Router Activity so that the appropriate calls proceed to the relevant operators. To do
this, we select the Call Router Activity, navigate to the Properties Tab of the ribbon,
and select 'Routing Out'. 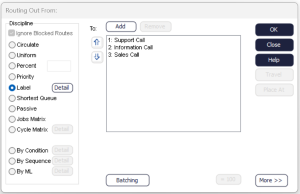
Select Label as the discipline, and then select 'Detail' in order to select which Label will dictate the routing. The order of Queues in the Routing Out From window is also important to note: in this example, our Label values will have a value of either 1, 2, or 3. These values, which represent the type of calls we receive, are related to the order of Queues above. Therefore, a Label value of 1 will be directed to the Support Call Queue, as it is the first Queue in the list.
To verify that the routing is working as you need it to, you may check the Current Contents of Queues
and Activities to see the associated Label. To do this, select a Queue, navigate to the
Advanced Tab, and then select Contents. For the Support Call Queue, all of the Call Type
Label will have a value of 1, therefore all Information Calls will have a value of 2,
and Sales calls a value of 3. 
If you have any questions about this tutorial, contact Minitab Technical Support.