Dialogs
Dialogs can be used to quickly allow changes to many of the simulation's settings at once without having to separately navigate to the tab or properties dialog of each feature.
They can appear as normal dialogs or as "Wizards" in a series.
Custom Dialogs can display Simul8 Information Store data and allow Information Store data and other parameters to be changed by the user. This makes it very easy for someone to use the simulation without previous knowledge of how to build simulations (and without the user having to use external packages like Visual Basic or EXCEL).
Custom Dialogs can appear when Components are clicked (replacing their properties dialogs), as new menu items on the Simul8 menu bar, when simulations or templates for simulations are opened, or at any time driven by Visual Logic.
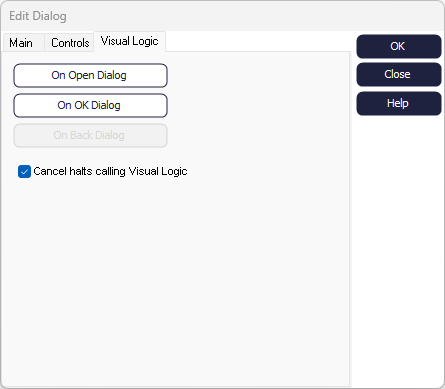
Building Custom Dialogs
- Select Dialogs from the Design tab
- Click New to create a new Custom Dialog. This opens up the dialog editor
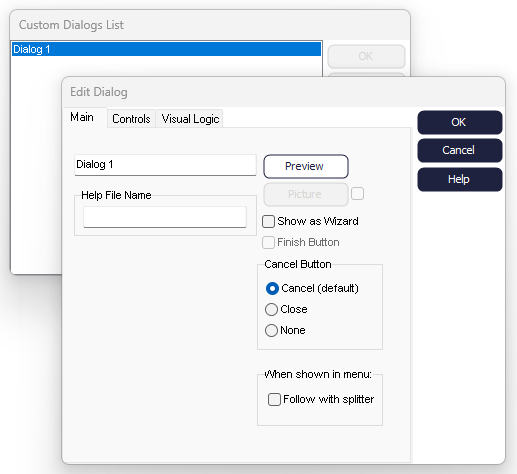
Main Tab
The Main tab is used for setting the title and for controlling the look of the Custom Dialog. You can "Preview" it, decide whether you want the Custom Dialog to appear as a wizard (by checking the "Show as Wizard" checkbox), and how it appears on Custom Menus.
Controls Tab

- Titles
- For adding titles and descriptions.
- Data Field
- For setting the value of a Global Data Item.
- Checkbox
- When checked, the Global Data Item used for this field gets a value of 1.
- Radio Group
- The Global Data Item gets a value depending on which Radio is selected (e.g., if the 1st Radio is selected, it gets a value of 1, if the 2nd Radio is selected a value of 2, and so on). To separate options, use a vertical bar ( | ) between them, for example "Radio 1|Radio 2|Radio 3".
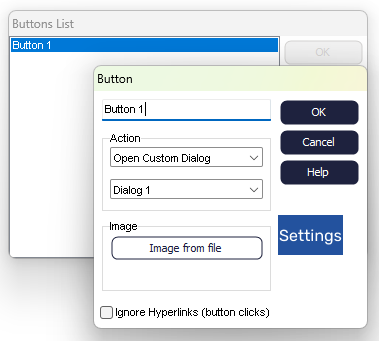
- Button
- This creates a new button that calls the on Button Click Visual Logic, i.e. triggers logic when the button within the dialog is clicked. Fill in "Text to display" to define how this will appear in the Dialog. The name of this button can also be found as a variable in the Information Store.
- Object Button
- This creates a Button that displays a Simulation Object dialog. To do this, type the name of the Object (e.g. Activity 1) on the Global Data Item field.
- Drop-down
- Use a text Global Data Item that will take the value of the drop-down option you select. For example, if the second dropdown option is "Scenario 1", your text variable will be set to "Scenario 1". To separate options, use again a vertical bar ( | ) between them, for example "Text Item 1|Text Item 2|Text Item 3".
- Spreadsheet
- This option displays a spreadsheet of your choice. The columns and the rows fields let you set the number of columns and rows shown by the Dialog. This option cannot be combined with other fields in the same Dialog. The spreadsheet will be displayed without header rows and will automatically add scroll bars if required. You might also want to check out the cell protection features in spreadsheets that will prevent the user editing cells you don't want them to.
- Check "Must be number" if the input should be in numeric format.
- If "Must be number" is checked, set the Minimum and Maximum values if there are constraints on the numeric input.
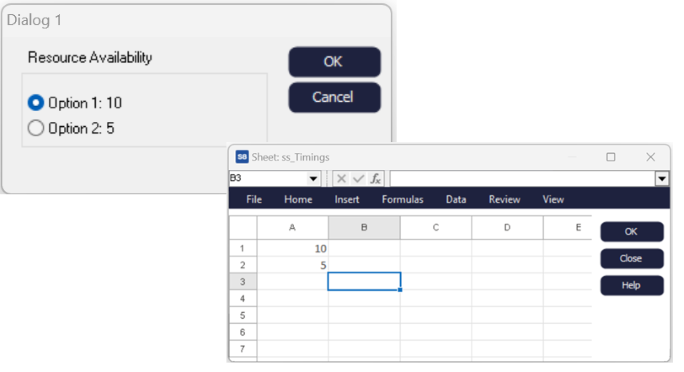
Using variables in Text
Shift's 1 End time is {ss_Timings[2,2]}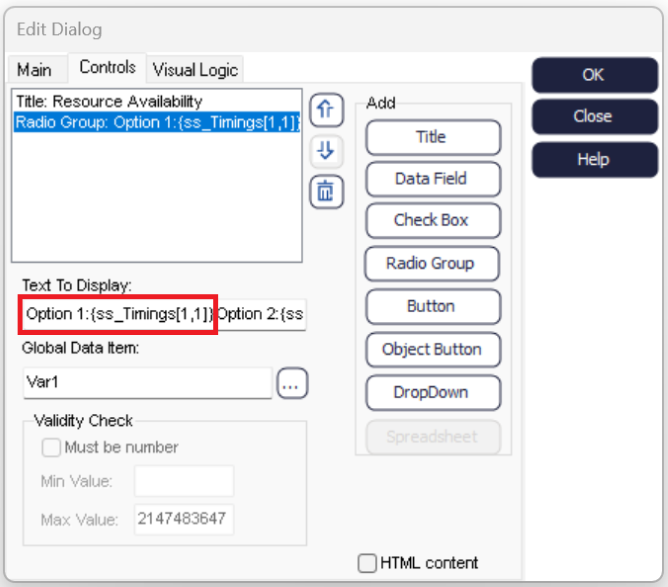
Dialogs Example
This example presents how some of a simulation's parameters can be set using Dialogs.
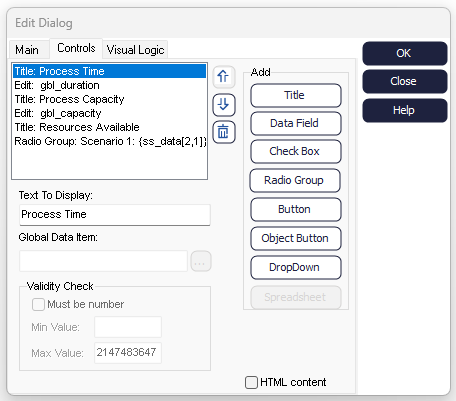
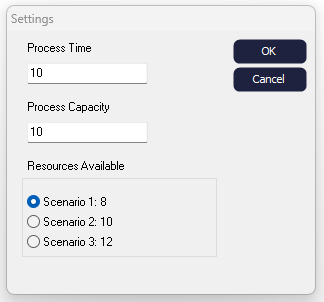
The Titles here helps you indicate what each Data field and the Radio Group refer to.
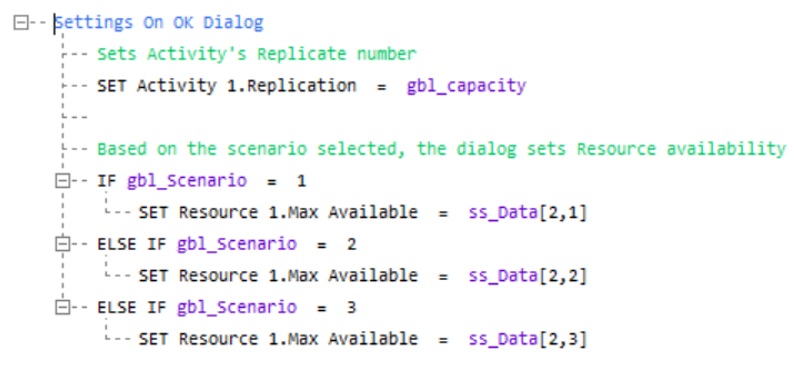
The Replication of Activity 1 is set to the value entered on the second field, i.e. to the value of gbl_Capacity, using the SET command. Instead, gbl_Scenario is set based on the Radio selected, i.e. the variable gets a value of 1 if Scenario 1 is selected, a value of 2 if Scenario 2 is selected, and a value of 3 if the third Scenario is selected. Resource availability is set accordingly.
Using Dialogs with Buttons
Buttons on Dialogs
Buttons placed on Custom Dialogs automatically call the On Button Click Visual Logic when they are clicked.
The BUTTON Global Data Item is set to the title of the Dialog and the text on the Button when the On Button Click Visual Logic is obeyed.
For example, if a Button is added to a Dialog called "My Dialog", and the button is titled "Arrival Schedule", the value of text variable BUTTON will be set to Arrival Schedule once the button is clicked.
IF Button = “My Dialog:Arrival Schedule”
Set main sheet Arrival_Schedule[1,1]
Display main sheet
Combo Boxes
A Combo box lets a user choose from a number of alternatives.
Combo Boxes are the drop down list boxes that are commonly used in applications. They let a user easily make choices between a number of alternatives and are space efficient when placed upon Simul8 dialogs.
Create a Simul8 Custom Dialog. Insert a Combo box by selecting the Drop Down option button. You will be required to associate a Global Data Item with the Drop Down item. This Global Data item must be a Text item.
When viewed the option box will be displayed.
When an option is selected the text from the item is passed in the Text Global Data Item. This means that if Option 1 is selected that the Global Data Item Var1 will have the string of text "Option 1" assigned to it. This can then be used in Visual Logic to execute different actions depending on the option selected by the user.