In this example, a customer services representative enters customer complaint data into a standard table. The representative either speaks on the phone or chats online with the customer about their concerns.
Create a standard table to include specified fields
First, the customer representative creates a standard table with the required fields. For this simple example, the customer representative collects the date, the customer ID, the customer region, and the type of issue. Follow these instructions to create a standard table for manual data entry.
-
From the Home screen
 , select the Minitab Connect button
  to open the Navigation pane. Under Tables, select Add New Table.
Or, from the Home screen, select the Add button under Tables.
to open the Navigation pane. Under Tables, select Add New Table.
Or, from the Home screen, select the Add button under Tables.
-
On the Dataset tab, enter the following:
- Under Name, enter Download Issues to identify the new table.
-
Under Folder, select the plus button to create a new folder.

- Under Name, enter Customer Team to name the folder that stores the new table.
- Under Parent, keep /(root) to create the new folder at the root level. Alternatively, you can browse to another location to create the new folder.
- Select Create.
- Under Status, select Development.
- Under Tables, select Standard.
-
On the Setup tab, add a new field for each variable in your table.
Click to add a field. opens a data entry field.
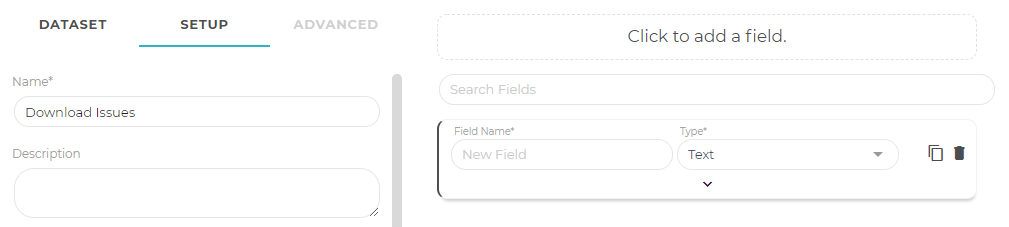
- Under Field Name, enter Date.
- Under Type, select Date.
-
Select the down arrow
 at
the bottom of the box to expand this field. Under Format, select Date.
at
the bottom of the box to expand this field. Under Format, select Date.
- Repeat Step #4 for Customer ID, Customer Region, and Issue. The Customer ID and Customer Region fields are
numeric, and the Issue field is text.
Note
For Text and Number fields, the default length values are usually adequate, but you can increase or decrease as you like.
-
Select Save
 .
.
When you save the table, the Prep tool ![]() opens and you can now add data to the table.
opens and you can now add data to the table.
This table has the four fields that you added. Select Add a Field at the top of this list to add any of the system fields to this view.
Note
Use the Base tool to add more data fields to this table.
Create a list field for a variable
In the next section, Add a new form, the customer service team creates a form to collect data. Because the team wants to use standard values for the customer region and the issue type, the analyst specifies a list for these fields to create dropdown lists in the data collection form.
Follow these instructions to create dropdown lists for customer region and issue.
-
Open the
Base tool
 .
.
-
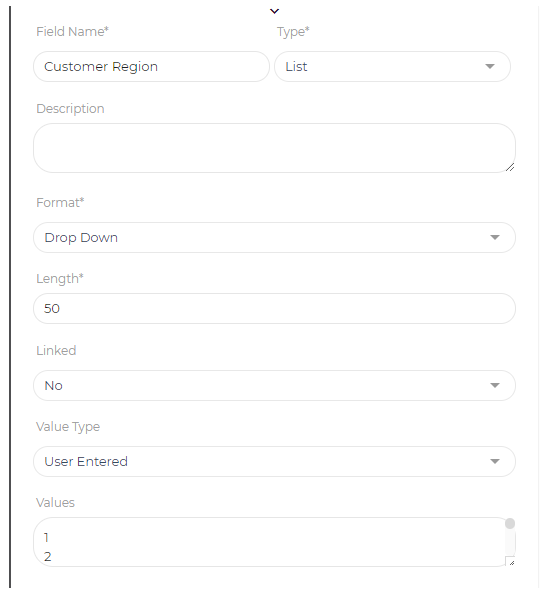
On the Setup tab, expand the Customer Region field.
- Change the Type from Number to List.
- Under Format, select Drop Down.
- Under Value Type, select User Entered.
- Under Values, enter 1, 2, 3, 4, 5, 6, 7. Press Enter between entries so each issue is on a separate line.
- Repeat Step #2 for Issue.
- Change the Type from Text to List.
- Under Format select Drop Down.
- Under Value Type select User Entered.
- Under Values enter Browser, Incorrect Billing, Incorrect Link, Return, Other. Press Enter between entries so each issue is on a separate line.
-
Select Save
.
Add data into the new table
Next, the analyst enters data into the table.
-
Open the Prep tool
 .
.
-
Select Add
 and populate the desired
fields.
and populate the desired
fields.
- Select Submit to add the record to the table.
-
If you want to import several records at the same time, use the Import button
 .
.
- Under Type, select Text to copy and paste multiple records at the same time.
- Under Type, select File to import a file with all the records.