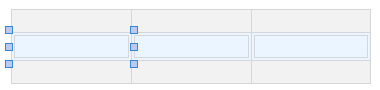
When you design a form, you can insert data-entry tables to collect data values that are
best displayed as rows and columns, for example, monthly financials, improvement
metrics, or tasks.
Note
In the web app: Design mode is not currently available in the web app.
To share data values across tools, forms, and projects, you must first connect the data-entry table to a Data Table category. Then, you must connect each form control in the data-entry table to a specific data field within the selected category.
Insert a data-entry table that is connected to a category
When you connect a data-entry table to a Data Table category, the data values are shared across tools, forms, and projects.
- In Design mode, select the location on the form where you want to add the data-entry table.
- Enter the number of columns to include in the table.
- Select Connect the repeating rows to a data source , then select Select Data Source .
- In the Data Connection Setup dialog box, select the data source of your choice, then select OK in each dialog box. The data-entry table is added to the workspace.
- Double-click the form control in the
first column.
- In the form control dialog box, select Select Data Field.
- In the Data Connection Setup dialog box, select a data field, then select OK in each dialog box.
- Repeat the previous 3 steps until you have connected each form control in the data-entry table to a corresponding data field in the data source.
Insert a data-entry table that is not connected to a category
When you do not connect a data-entry table to a category, the data values are not shared across tools, forms, or projects.
- In Design mode, select the location on the form where you want to add the data-entry table.
- Enter the number of columns to include in the table.
- In the Insert Data-Entry Table dialog box, select Do not connect the repeating rows to a data source.
- Complete the dialog box to format the form control, then select OK.
Format a data-entry table
After you insert the data-entry
table, you can format it to have any of the following features.