Use Built-In Version Control Tools
Version Control can be extremely useful to keep track of changes and revert to previous versions when working alone or as part of a team. It can also let you collaborate on the same simulation, when working as part of a team. You can read more about how to Setting up Version Control here, including help with using 3rd party version control tools.
When working collaboratively, users will work on a local version of the project saved on their own machine. These changes can then be uploaded and merged into the files saved in the shared file location.
It is important to regularly sync any changes you have made to the shared location so that others can see your changes. Similarly, you will need to retrieve any changes made by others. How often you do this will depend on lots of things like how big your simulation is, what and how many changes you are making and how many others you are working with. Generally, it's better to save a version and synchronize files changes often. This keeps you up to date with your collaborators and keeps any necessary reversions small. Simul8's "Sync Changes" button will handle both the sending and retrieval of changes to and from your shared file location in one easy step.
Once you have set up Version Control, you can start working on your simulation. On the right-hand side of the Simul8 window, you will see your Version Control Tools. They will open automatically once you have completed the "Setup" process, and you can hide or reopen them using the buttons on the Ribbon under "Version Control".
View Changes and Create Versions
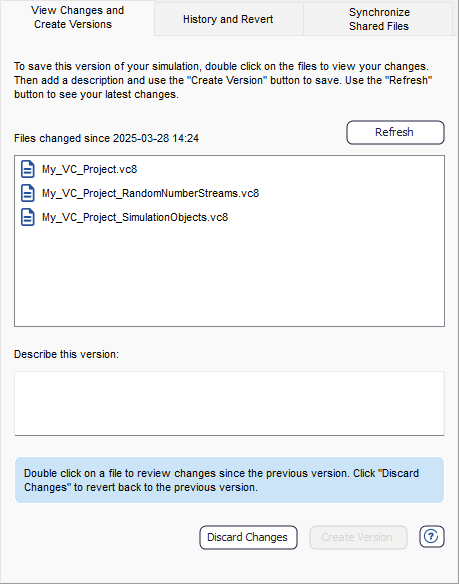
The first tab - View Changes and Create Versions - can be used to see what has changed since you last created a version and to create your next one. You can think of versions as "Snapshots" in time, that you can view and even revert to, if needed.
To view what has changed between the version you are currently working on and the last saved version, click Refresh. You will now see the different elements of the simulation broken down into different files. You can double click on any of these files to see your changes.
Suppose you are happy with your changes and decide now is a good time to save this version of your simulation, giving you the option to come back to it, should you decide to. Enter a quick description detailing the changes made in this version. This helps to remind you, and inform others, what is different between this version and the previous one. An example could be "Created Nurse resource, allocated shifts and applied to all relevant workstations" or "Finance data added to all activities in line 1. Still need to add to line 2". You are required to enter a description, but it can be anything that helps you to remember what this version contains.
After entering your description, press Create Version. As simple as that, you have created your first version. At this point, if you are working independently there are no further steps to take. If you are working on a collaborative project and want to share your changes with colleagues, head to the "Synchronize Shared Files" tab.
Review Dialog
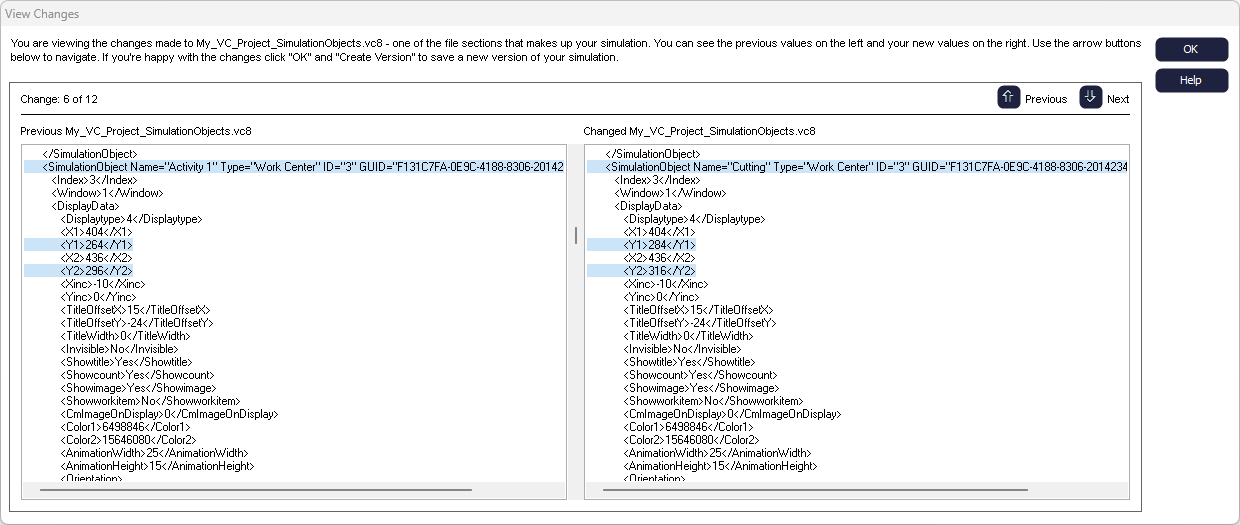
When you are reviewing your changes in the View Changes and Create Versions tab, double clicking any of the files will display your previous version and your current version side-by-side for easy comparison. The changes are displayed in XML format as this is how we save the data in your .VC8 files, we chose this format because it is both machine and human readable.
Any new changes will be highlighted in blue on the right. You can scroll through or use the up and down arrows to skip between the highlighted changes.
History and Revert

As you start to create more versions, you can use the History and Revert tab to see the history of your simulation. You will see a chronological list of versions with the creation time and date, the description and who created it.
Highlighting a version and clicking on View Version lets you view that version. You can interact with the simulation to view your changes in detail and run the simulation to see results. You can jump back to your current version by clicking on Current Version. Be mindful that any changes made when viewing a version will not be saved, as this is not your current working version.
If you decide that you want to abandon the recent changes and revert to any previous version, in order to continue working from it, simply highlight your chosen version then click Revert to Version and this will become your current working version. You'll see a new entry in the History section to reflect this reversion.
Synchronize Shared Files
If you are working on an independent project, you will not have access to the final tab - Synchronize Shared Files. However, if you are working collaboratively, you will need to keep your version in sync with the files in the shared location if you want to be able to retrieve other people's changes and for them to retrieve yours.
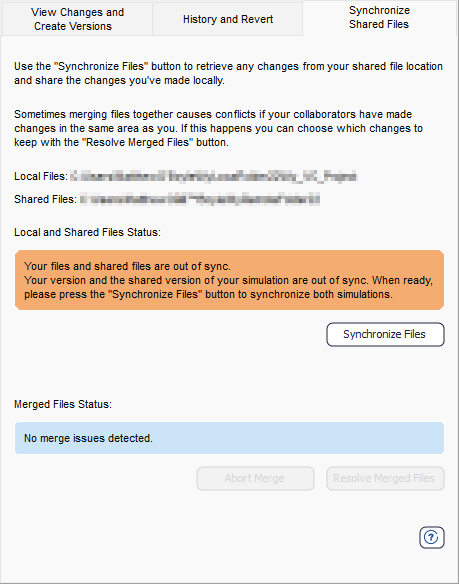
On the Synchronize Shared Files tab, you will see both your local and shared file locations and a status message indicating if the locations are out of sync. To update your files, and those in the shared location, hit the Synchronize Files button.
In the background, Simul8 will check what changes you have made to your local files; and what changes others have made and pushed up to the shared files. It will also perform a check to see if merging the files together will cause a conflict (usually caused by changes being made in the same area). If no conflicts are detected, Simul8 will then automatically combine the files together. It will then update both your local files and the shared files.
Merge Conflicts
What happens if there are conflicts when you merge? Say 2 separate collaborators both create a new resource called Operators and assign them to different activities. We call this a Merge Conflict.
If this happens, when you try to Synchronize Shared Files, Simul8 will detect the conflicting information. Simul8 will try to resolve these conflicts automatically, however, there will be times where this will require some intervention from you. If this happens, you will then be presented with 2 options:
- Abort - This will cancel the synchronization leaving both your files and the shared files unchanged. This gives you the chance to amend your changes to avoid a merge conflict. This could be a good option if you spoke to your colleague and agreed that your Operators resource should be changed to Night Operators.
- Resolve Merged Files - Alternatively, you can go ahead with the synchronization by deciding on which conflicting changes should be kept and which ones discarded.
If you select Resolve Merged Files, Simul8 will open the dialog below:
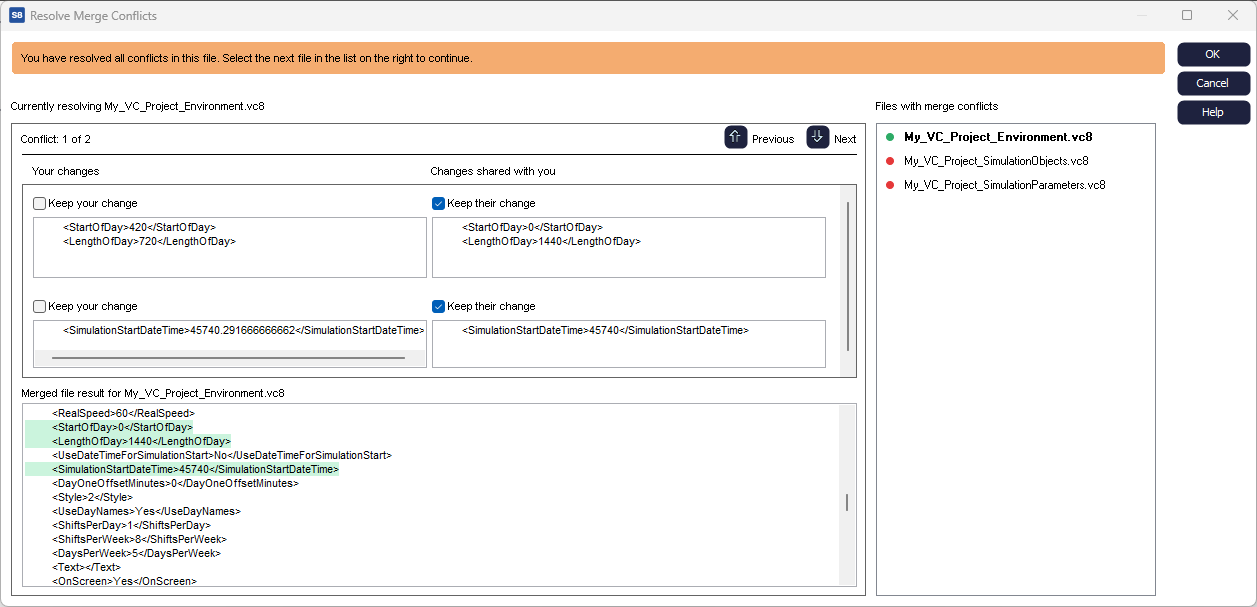
When resolving merge conflicts, you will see a list of the impacted files that contain a conflict. Selecting each file in turn, you will be presented with a side-by-side view of your local changes and the changes that were retrieved from the shared files. For each conflict, you have the option to choose to keep either: your changes, the changes shared with you or, if it's appropriate, both changes. Once you have indicated your decision by ticking the appropriate box(s), the merged file result window will show you the result and will turn green. If you decide the best solution is a different one from either yours or the other changes, you will need to click Cancel and then Abort the synchronization so you can go ahead and make the changes in your model before attempting to sync again.
After selecting which change to keep, click the next arrow to see the next conflict in this file. When you have resolved all the conflicts in a particular file, it will be indicated with a green dot in the files list. You can then move to the next file, if required. In the image above, you will see the changes in 'My_VC_Project_Environment.vc8' have been resolved already by selecting to "Keep their change". The conflicts in the file "My_VC_Project_SimulationObjects.vc8" still need to be resolved.
After resolving all merge conflicts, click OK and Simul8 will update both your local and shared files with the changes you chose to keep, as shown in the merged file result window. Simul8 is a powerful tool with a very large number of features, parameters and options that you can change. We would therefore recommend validating your simulation after resolving merge conflicts to ensure it is still behaving as intended and you are still seeing expected results.
Tips for a smooth merge process
- Communicating with your team about changes you plan to make.
- Synchronizing regularly to help avoid merge conflicts.
- Work in different areas.