Excel Connections

With the Excel Connections feature, you are able to import and export data and results in just a few clicks.
You will find the Excel Connections on the Integrate tab. Select Excel Connections and a window containing a list of all connections will appear. From this menu, you can create, edit and erase Excel Connections, and use this window to perform the actual import and export of data.
The process for setting up an Excel Connection will differ slightly if you are using Simul8 Online.
New Connection on Simul8 Desktop
From the Excel Connections window, select New; this will open the Excel Connection Properties window. This is where you will set up the link to Excel. As a first option, you can give your Excel Connection a name that you will recognize, e.g., for performing the import of your simulation input data, or the export of an internal spreadsheet that has your results in it.
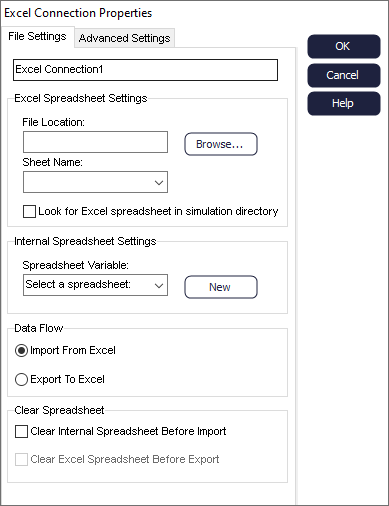
- Use the Browse button to search for the Excel file you wish to use for importing/exporting data. When this file has been chosen, Simul8 will automatically look into Excel and generate the sheet names so that you may select the sheet you want to reference from the dropdown (by default that is "Sheet 1"). When you select an Excel sheet, Simul8 will automatically calculate the area that is populated by data.
- The Internal Spreadsheet Settings determine what Simul8 internal spreadsheet you are using for importing/exporting. For importing, this is for instance the internal spreadsheet that will have your simulation inputs, such as Activity timings, on it and is maybe already referenced by simulation objects. For exporting, this can be your internal spreadsheet where you store results. Also, you can use the New button to create a new internal spreadsheet directly from the Excel Connections Property menu. The Internal Spreadsheet Settings determines what Simul8 spreadsheet you are using for importing/exporting. You can use the New button to create a new internal spreadsheet directly from the Excel Connections Property menu.
- The Data Flow section determines the flow of data, whether you are moving from Simul8 to Excel, or Excel to Simul8. In other words, it simply determines whether you import or export data.
You can also choose to clear the spreadsheets before import/export.
New Connection on Simul8 Online
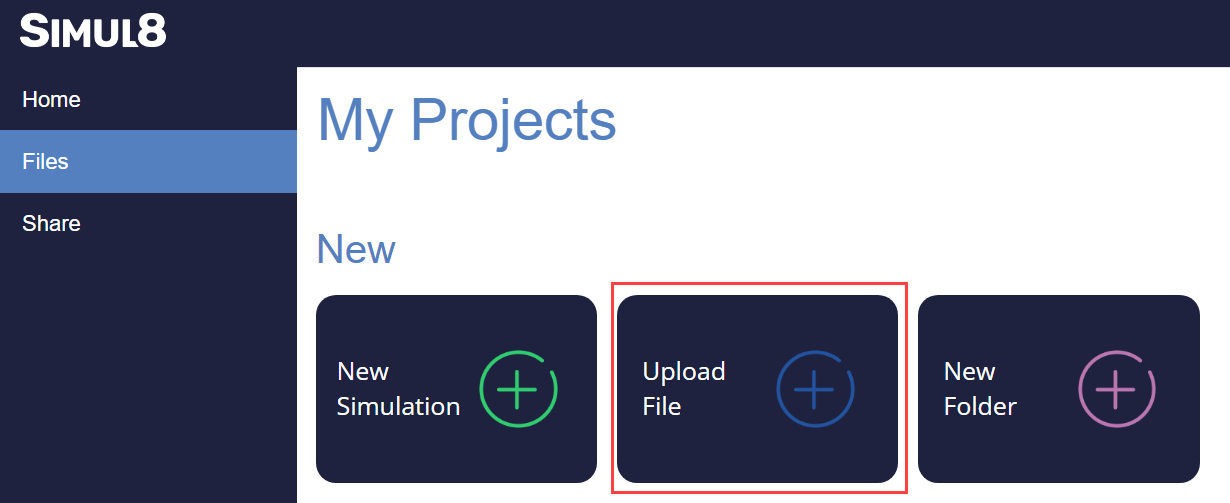
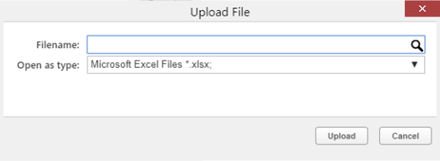
- Upload your Excel file to My Projects. You will then
see this in your External Files.
- Open your simulation and create an internal spreadsheet from the Data and Rules tab.
- Go to Data and Rules, open Excel
Connections and click New. You will
then need to click browse and choose the Excel file that is in My Projects
from your computer.
- While in the desktop version the Excel sheet name comes from a drop down,
Simul8 Online requires you to type this name exactly as it appears in your
Excel.
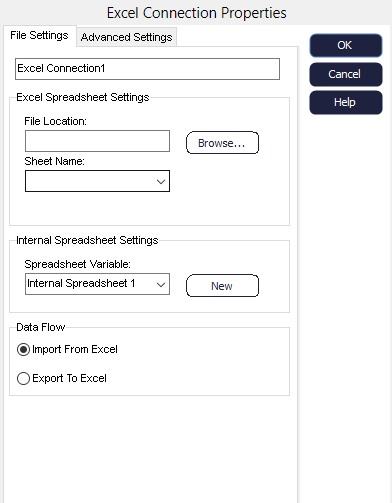
- You can now change Internal Spreadsheet Settings and the Data Flow.
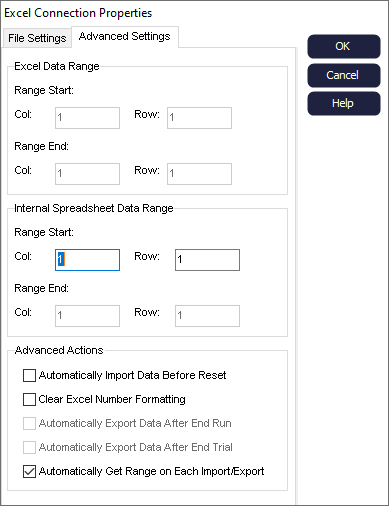
Advanced Settings
Note
Excel is limited to 1048576 rows of data.
Once you have created your connection, choose OK to see your connection on the list.
Excel Connections List
Select the connection and click the Import/Export button to transfer the data.
For ease of use, once you have created connections, you can import/export multiple connections at once.
To do this, navigate to the Integrate tab, and select Import All or Export All on the Microsoft Excel Connections section. The dropdown on each also allows you to import or export a specific connection without having to open the connections menu.
You can also import an Excel file through Visual Logic using the Get from Excel command, and export a spreadsheet into Excel with the Set in Excel command.