Resources Tutorial
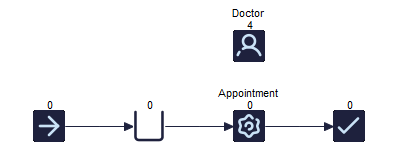
When you drag a Resource onto your screen, it looks something like the image above. You can change the name of a Resource and the quantity available by selecting the Resource and using the ribbon. For example, our Activity is an Appointment and the Resource is a doctor, and we have 4 available.
When should I model Resources?
You should include Resources in your model in 2 situations; 1 - If you have Capacity issues (i.e. if you have too little or too much Resource) 2 - If the number of Resources you have available is Variable (i.e. more staff on during the day than at night)
Assigning Resources

You can assign several different types of Resource to one Activity, and an individual Resource can also be assigned to many different Activities. This gives a lot of flexibility when incorporating Resources into your model.
How can I see where my Resources are assigned?
If you click on a Resource, all Activities where it is assigned will be highlighted in red. You can also see an overview of this in the Resource Matrix (Build ? Resource Matrix)
Requiring and Releasing Resource
It is possible to setup your Resource so that it stays with a Work Item through several steps in your process. This is particularly useful for things like hospital beds, which will usually be used during a patient's stay in hospital, and then released when the patient leaves.
The default setting is that when you assign a Resource to an Activity, the Resource is 'required' at the beginning of the Activity, and then 'released' when the Activity is complete. You can change this so that, instead of being released when an Activity finishes, the assigned Resource is retained, and stay with the Work Item until you say otherwise.
We will explore these options with the example below;
Step 1: Build your example and assign Resource
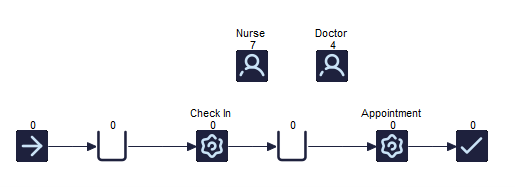
In this example we have a Doctor's Office where the Nurse is needed both at Check In and at the Appointment while Doctors are only needed at the Appointment. We can set this up so that a Nurse stays with a Passenger during the process of Checking In until the end of the Appointment.
First, assign the Nurse Resource to both Activities either in the Activities or via the Routing Arrows.
Step 2: Alter your Resource Requirements
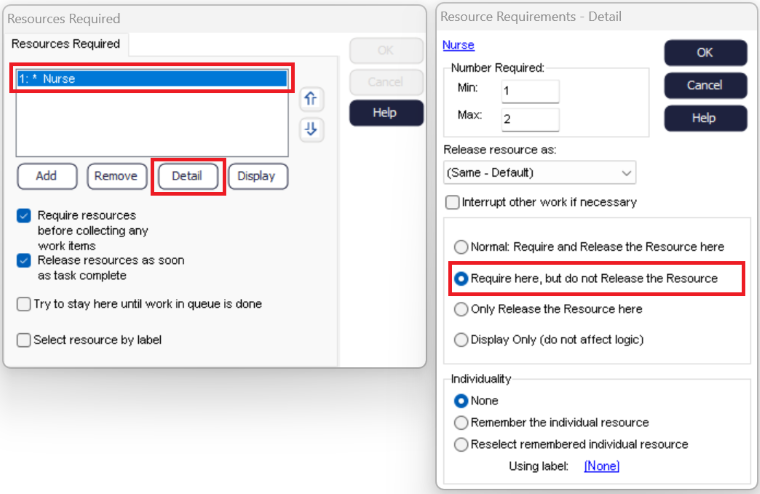
The four options on the bottom half of the second Dialog give you the option to change the default Resource requirements. The top option is the default.
We want to change this so that we do not release our Resource after the Check In Activity. Select the second option: 'Require here, but do not Release the Resource'. This means that the Resource will stay with the Work Item until you tell it otherwise.
Step 3: Release your Resources
We now need to set our example up so that we release our Resource after the Appointment Activity.
Select the Appointment Activity, and access the same dialog as before ()
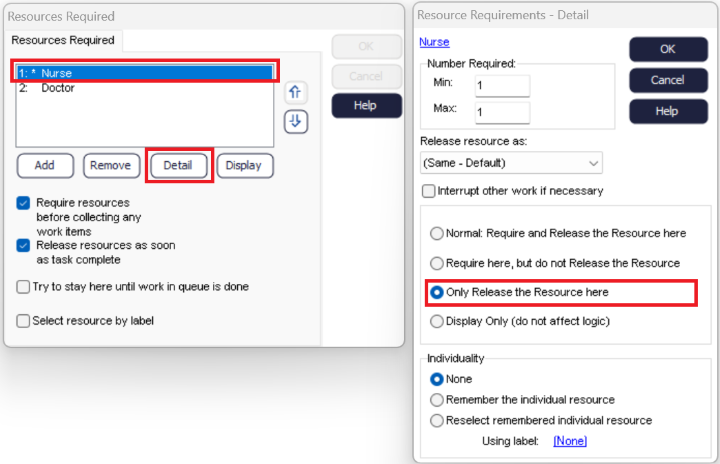
Select the third option, 'Only Release the Resource here'. We already have a Resource with our Work Item from the previous Check In Activity, so we don't need to Require another one. All we need to do is tell our model to let the Resource go after 'Appointment'.
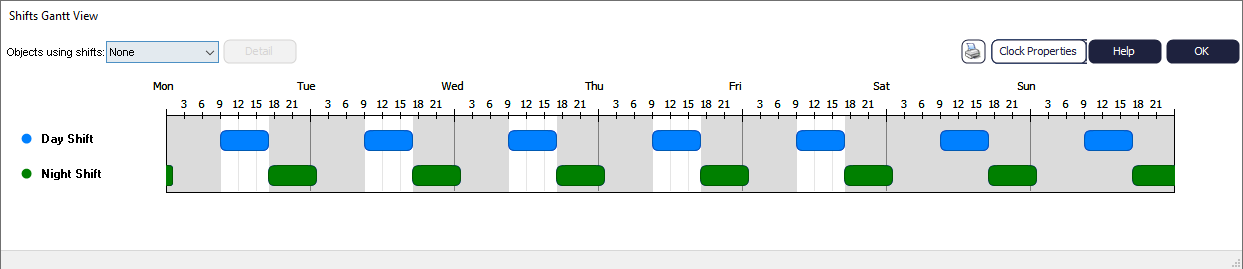
Shift Dependent Resources
So far we have assumed that we always have the same number of Resources available regardless of the time of day. In reality, this is likely to change, and different quantities of Resource may be available on different Shifts.

Tell your model the Start Time, End Time and Days of the Week your Shift runs on.

Once you reset your model, you will see that the small number above each Resource depends on what time of day it is (i.e. which shift is currently running).
Will all of my Resources be Shift Dependent?
Not necessarily; some Resources may have the same number available regardless of what time of day it is (e.g. Hospital beds, or machinery in a factory). You do not have to make your Resource Shift Dependent if the number available does not vary.