Clock Setup
There are several things to setup on your clock to ensure you get the most from your simulation. The clock is integral to Discrete Event Simulation because it tells you the time in your model.
Before going any further you need to decide which time units to work in (seconds/minutes/hours). You should also think about how long to run your simulation for i.e. do you want to look at your process over a day/week/month/year?
To access your Clock Properties, simply double click on the clock on the main simulation window, or right click and select "Clock Properties". You can also access Clock Properties through the Data & Rules tab.
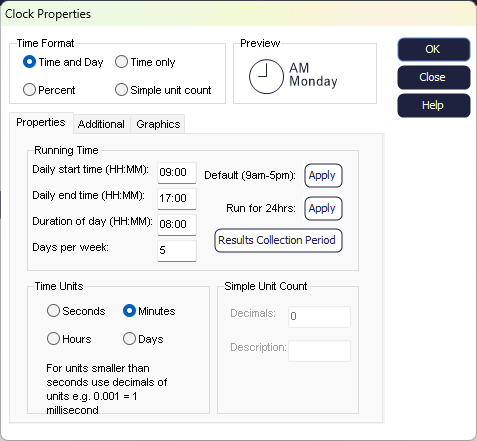
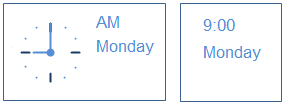
The first thing to decide is the time format. You can choose between:
- Time and Day: this is the default setting and will display the current time and day of the week (i.e., Monday, Tuesday, etc.)
- Time Only: only the time will be displayed
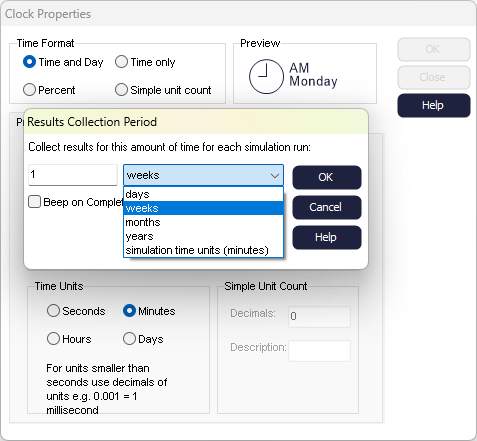
- Percent: this shows the current percentage based on the Results Collection Period (for example, if your simulation runs Monday to Friday from 9AM to 5PM, 100% will correspond to Friday at 5PM).
- Simple unit count: choosing this option will show the current time unit based on time elapsed since the start of the run (unit 0).
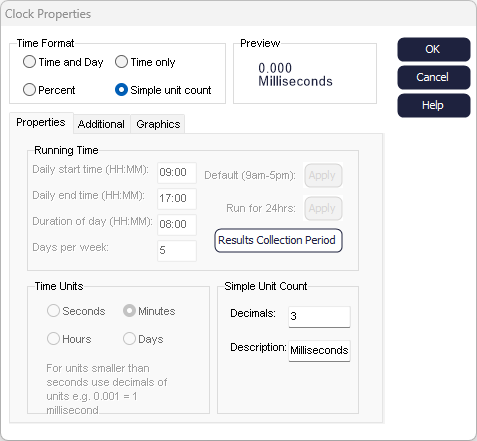
Properties
In the Properties tab, you can set up the Running Time, Time Units, and specify more details if using the Simple Unit Count format.

Running Time
This is where you can set up the duration of a day for your simulated process. This requires the 'Daily start time' and the 'Daily end time' or 'Duration of day', all to be entered in a 24-hour clock format. When you enter the 'Daily end time', the 'Duration of day' will be automatically calculated. Likewise, when entering the 'Duration of day', the 'Daily end time' will be automatically calculated.
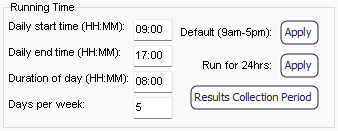
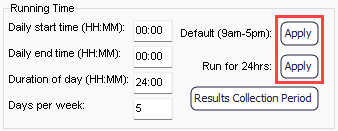
You can choose whether you want to run for 1 day, 10 years, or somewhere in between.
Time Units
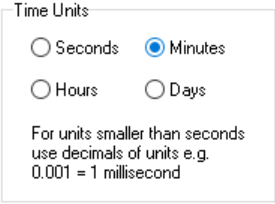
All timing values in your simulation will follow the time unit you select. For example, if you choose "Hours", all values must be entered in hours.
For this reason, minutes is the most common time unit used in Simul8. It is much easier to enter a large number of minutes to equal a couple of hours (e.g. 240 minutes = 4 hours) than it is to work in hours and try to work out what 23 minutes equates to.
Note that when changing the time unit, this will apply to all existing Objects. Therefore, an Activity's Timing set to 10 minutes, will be set to 10 hours, if hours as selected as a time unit.
Simple Unit Count
Additional
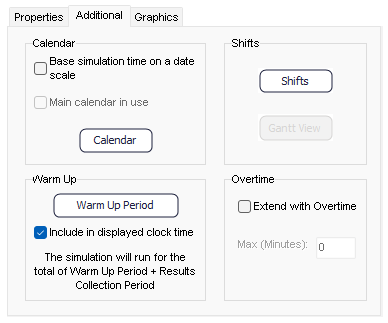
Calendar
If you want to set a specific start date for your simulation or implement complex working day patterns, you can set up a Calendar.
Please note, the Calendar is not available if you are using the 'Simple unit count' format.
Shifts
If you would like to define what times of day, parts of your simulation work, you can easily create and edit Shifts from the Clock Properties' Additional tab. Once you have created a Shift, you can assign it to Simulation Objects as needed. For more information, go to Shift Work Patterns.
Please note, Shifts are not available if you are using the 'Simple unit count' format.
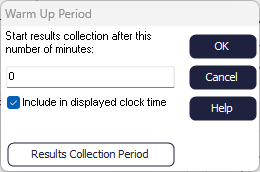
Warm Up Period
The Warm Up Period is the time at the start of your run, where your simulation has not got up to maximum productivity yet. For example, a machine can be switched on at the start of a day at 9am, but it is ready to process items 30 minutes after it has been switched on.
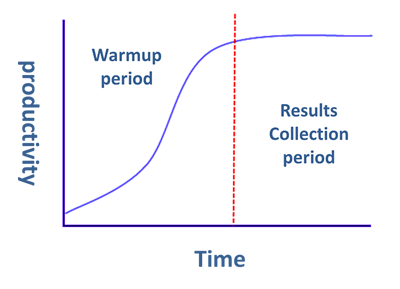
In some simulations, you may not want to include your warm up period in your results; in this case you should enter a Warm Up Period so that your simulation doesn't start collecting results until after this specified time.
Overtime
There are also options to include an extension of Overtime in the simulation day. Check the box for "Extend with Overtime", then enter the maximum time to be added to the clock at the end of the day to help process items in the system. Arrivals will cease during overtime to allow other objects to process work after hours. The maximum time entered is in the format of the current time units for the simulation.
Graphics
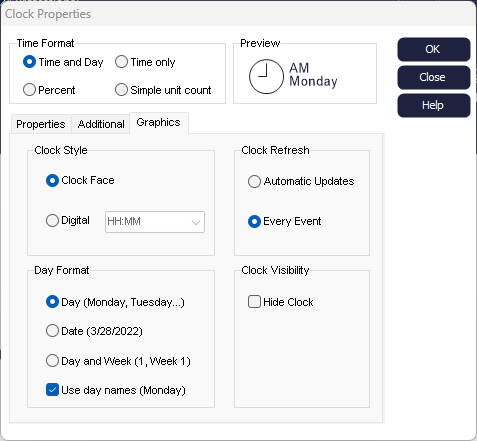
Clock Style
Day Format
- Day: displays the day as a number or word depending on whether the "Use day names" box is checked.
- Date: displays the date either in MM/DD/YYYY or DD/MM/YYYY depending on the date settings of your computer.
- Day and Week: displays the day as number or word and the week. On models with a shorter Results Collection Period, displaying the Week is less relevant; however when you start modeling a year at a time, it can be a quick way of seeing how far through a year your simulation is.
Clock Refresh
In Automatic Updates mode, the clock is updated only once every 1/10th of a second.
If choosing "Every Event", the clock face will update after each event in your simulation. Updating after every event is the most aesthetically pleasing view of the clock. However, this can take a significant proportion of run time and is slower than using Automatic Updates.